April 28, 2017

How to Make a Polymer Resin Bracelet

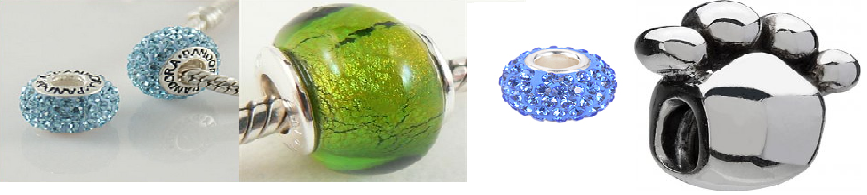
You know how you sometimes have an idea for something you want to make but you just can't find the right item to match the picture in your mind? Well, you don't have to search any more if you use resin. Resin is one of the simplest methods of making jewelry. You can make your own mold (very simple) and can cast your own jewelry pieces in any shape you want. Resin pieces are hard and look like glass. Like these:

You will need:

Mold with square shapes
Tiny beads or glitter
Resin
Resin catalyst
Plastic cups
Mixing stick, such as a wooden craft stick or plastic straws

Spray the mold with a mold release spray. The spray prevents the resin from sticking to the mold, which simplifies the process of removing the cured resin pieces later. Let the spray dry then reapply.

Pour ½ ounce of the resin into a plastic cup and pour a small amount of resin catalyst into a different cup. For best results, follow the manufacturer’s directions for exact measurement of the catalyst. Pour the catalyst into the resin and mix thoroughly. Do not whip the mixture to avoid creating air bubbles.

Pour a thin layer of the resin mixture into the molds and sprinkle a small amount of glitter or beads into it. Let the resin become firm.

Mix another ½ ounce of the resin and catalyst and pour it into the molds. Set the mold in a warm place and let the resin cure for about three days. Push the pieces out of the mold when they are fully cured.

Sand the edges of the pieces under water until smooth. Make sure the shavings wash off the sand paper as you work to avoid sanding them into the resin pieces. Dry the pieces. 

Drill two holes through one side of each piece. Ensure that they are spaced at an equal distance from the edge. Clean out the shavings.

Cut two pieces of elastic thread and thread the resin beads to form a bracelet. Tie the ends of the thread with a square knot. Place a drop of glue on the knot to secure it. Let the glue dry completely. 

And voila! Your bracelet is ready. Enjoy!

December 22, 2011

Hello, folks! It's been a loooong while, I know (shamed face). I got distracted, playing catchup in other areas of this life. I have not given up on jewelry-making, although I did have to put it aside for a while. I just returned to it with renewed vigor and I've been making new things at an almost feverish pace since last week. The ideas have been coming thick and fast, and I have to sketch them quickly before I forget. I look forward to sharing tutorials on some of them soon.

For now, check out my Etsy store, Adamma, to see what I've been making: http://www.etsy.com/shop/adamma. Here's a preview, enjoy!

October 3, 2010

What are Chamalia beads?

Chamilia beads may be the answer to questions you didn't know you had! I know you have jewelry pieces you love but don't you get tired of wearing the same things over and over again? Sure, you can create any number of jewelry pieces but the point is, once you create them the beads cannot be changed. That is, without destroying the piece and starting again. Also, have you noticed that the gift-giving season is almost upon us again? If you have a large number of people on your list, the idea of creating jewelry for each of them may be overwhelming. Fortunately, it doesn't have to be that way.

Chamilia beads, also called pandora beads, are informally named after the founding company, Chamilia. The wonderful idea behind this company was to produce changeable beads that women can use to personalize their jewelry as they wished whenever they wished. These beads have large centers that make it easy to string and remove them as you like. And to do it with style! The beautiful beads are available in valuable elements such as 14K gold, silver and Swarovski crystals.

Here are a few of the Chamalia beads that I like:


And this is how to use the beads: How to Assemble


If you are here, it means you enjoy creating jewelry for yourself or as gifts. The complicated design techniques produce beautiful and unique jewelry but face it, those take a long time! If you are used to working a long time on one piece then it may seem like cheating to create bracelets and necklaces quickly with something so simple. However, if you want something beautiful in a pinch that you can customize everyday then Chamilia beads are the way to go, I think. There is such a large variety of beads that no two compositions will look the same. Have fun with it!

June 15, 2009

How to Bead Crochet

I didn't know how to crochet when I decided to learn to bead crochet. That shows that it's not that difficult to learn. Now, I love to crochet, not just necklaces, but purses and handbags. This is a picture of my very first bead crochet necklace. It was fun to do and I ended up with a unique accessory. I learned by watching "Bead Crochet with Carol Perrenoud." This is a fantastic video and Carol makes it so easy to follow along. Like I said earlier, I didn't know how to crochet but at the end of the video, I was well on my way with my necklace project. I got this video from my local library (VHS tape) so you might find it at yours. If you want to buy it, it is available from Yarnbarn, owners of Victorian Video Productions. You can also purchase from private sellers on Amazon or search for other retailers on Google.

Okay, here's a short tutorial on how to bead crochet.

1. String beads on crochet thread. Small beads are best. If you are very new to bead crochet, I suggest using pony beads at first until you've got the technique down. String on as many as you can for the item you are making. You might find it easier to use a bead spinner instead of stringing the beads on one by one as I did at first. If you don't have a bead spinner, get a wide-eye beading needle and pour your beads into a bowl. Dig the needle into the bowl and try to get as many beads on as possible.

2. Tie a small loop in your crochet thread.

3. Pass your crochet pin into the loop so that the loop rests on the neck of the pin.

4. Catch the thread with the hook on your crochet pin. Pull the pin and the thread out through the loop. You've made your second chain.

5. Catch the thread with the hook on your crochet pin. Pull the pin and the thread through the loop on your pin. You've made your third chain.

6. Repeat the last step until you have made about six chains. Now it's time to start crocheting with the beads.

7. Push a bead down the thread until it rests against the crochet pin. Catch the thread with the pin and pull through the loop on the pin. You've made your first beaded chain.

Repeat the last step until you reach your desired length.

And that's it. Not very difficult, is it? When I was done with mine, I folded the chains into about five strands and tied the ends. Then I wrapped each end tightly with wire and added clasps. That's how I made the necklace up there. I wanted more bead crochet projects when I was done with this necklace so I got this book from Amazon:


It has some exciting projects and even shows you how to crochet with soft wire. There are many other bead crochet bookswith even more awe-inspiring ideas. You are not limited to jewelry with bead crochet. I've seen some lovely purses, handbags, blouses, scarves - you name it. You might get addicted! Have fun!

Edit:
To create the necklace pictured above, I used:
Size 10 crochet thread
Seed beads

Consider practicing with some cheap beads first before using the ones you value.


June 13, 2009

About Pewter Jewelry

I have noticed that there’s a lot of interest in pewter jewelry lately. I’ll tell you now that I don’t have much experience with them but I’ve done some research. What I’ve found out is that some jewelry artists prefer to use them in their creations because:

- It costs less than sterling silver but can look like silver at first glance

- It is non-allergenic

- It does not tarnish

However, watch out for lead. Although the use of lead is on the decline, some pewter pieces contain a small amount. Another disadvantage is that pewter is soft. Since it is so soft, it’s really not a good idea to use pewter findings on jewelry that you want to wear for a long time. Clasps have to be opened and closed often and pewter clasps usually break after a period of time.

If you are interested in learning how to make pewter jewelry pieces, Naergi’s Costuming Site provides in-depth instructions. Practice with extreme caution however, it seems to be a messy and dangerous job!

This video isn’t about making jewelry, but it shows the process of using pewter – just to give you a general idea. You might find it informative.

September 3, 2008

Square Stitch

This simple stitch is a good substitute for looms. It might be a bit clumsy in the beginning as you try to hold the first two rows in place, but it gets easier to handle when you have more rows.

For this tutorial, you will need beading thread, beading needle, and beads. I would advise the use of larger seed beads for starters. Consider size 8 or 6. This is just so you can get used to the technique. When you are ready to apply it to a project, by all means use the seed bead of your choice.

There is more space in the diagrams than there should be in your work. They are there just so you can see the process clearly. So we begin.

1. Cut a comfortable length of beading thread and thread your needle. You will use a single thread, so make your working tail longer than the other.

2. String one bead and either tie it or pass the thread through it twice. This is your stop bead, it will prevent your work from unraveling. If you tie it, make sure you pass the needle back through the bead so that you are ready to add more beads.

3. String on 5 more beads. These 6 beads make your first row.

4. To begin the next row, string 1 bead. Pass the needle back through the last bead of the first row.


5. Pass the needle back through the first bead of the second row.


6. String one bead. Pass the needle through the next bead on the first row, from right to left.


7. Continue this process until you get to end of the second row.

8. To begin the third row, string one bead. Pass the needle back through the last bead of the second row, from left to right. Then pass the needle back through the first bead of the third row, from right to left.


Continue to your desired length. Make the thread taut, so that the beads are snug against each other, but not so tight that the work becomes uneven.

July 31, 2008

Flat Even Count Peyote

Are you interested in learning bead weaving techniques? The next set of posts will be on the various techniques, including even count peyote, uneven count peyote, circular peyote, ladder, herringbone, square stitch and more. We'll start with Flat Even Count Peyote.

Even count peyote is so named because you will need to start with an even number of beads. Use this stitch for flat projects like straps, bracelets, even amulet bags. It's a simple stitch, one of the first that a beader learns to do.For this tutorial, you will need beading thread, a needle, and beads. For practice, you may want to start with bigger seed beads, like size 8 or 6. Make sure you choose beads with holes that are big enough for thread to pass through about 3 or more times. I have spaces between the beads in the diagram to make it easy to understand the process but there should be no spaces between your beads as you work. However, don't pull the thread too tight or your work will bunch up.

1. Cut a comfortable length of thread and pass through the needle eye. You will be working with a single thread so make one tail of the thread, your working tail, longer than the other.

2. String one bead on, about 6 inches away from the end of the thread, and either tie it or pass the thread through it a couple of times to secure it. This bead will act as a stopper to prevent your beads from sliding off the thread as you work.

3. String 5 more beads onto your thread.

4. String one more bead and, skipping the sixth bead, pass the needle through the fifth bead. Pull the thread so that the sixth and seventh beads are snug.

5. String another bead and, skipping the fourth bead, pass the needle through the third bead.

6. String one more bead and, skipping the second bead, pass the needle through the first bead.

7. String one more bead. At this point, you are going to start another row, the third row. Pass the needle through the next protruding bead, bead 1 in the diagram.
8. Continue in this fashion, stringing on one bead and passing the needle through the next protruding bead. After a few rows, your work should begin to look like the diagram below. Of course, this is a rough representation, there should be no space between the beads.


Now, if this is process is a bit confusing for you, you might enjoy the animated tutorial at Michael's or you can watch this video:


January 5, 2008

Happy New Year Everyone! I hope you had wonderful celebrations this past month. I certainly did, and if I never see another turkey it won't be too soon! :)

Did you make any resolutions in regards to making jewelry? Maybe it has to do with finally getting the right tools to make your work easier, setting aside some time for yourself to work on this craft you love, working on that bracelet pattern you've had your eye on or getting up enough nerve to display your work at a craft show. Whatever it is, I say 'good for you'! Some of these are my goals for the year, especially the craft show part. I love this craft but I'm running out of space for my jewelry so it's time to find good homes for them. Also, supplies don't fall off trees now, do they? :)

If you're itching for a new project, check out this pretty right angle bracelet. The instructions are straightforward and easy to do.

Also check out my jewelry site, [Removed] for more patterns, practical information on bead weaving techniques, beads, tools and other supplies. If you want to take a look at some of my work, check out my etsy shop at www.enchantedjewelry.etsy.com. Have fun!